The pistons are a great way to implement lifts (elevators). This article will show you several ways to make lifts using the pistons. We will have simple ones that just take you upstairs, to one where you can choose the floor you want to stop at. There is even a 2-D people mover (not just a lift!)
Notes[]
- When connecting wires to pistons it is best to connect to either the bottom or the side of the piston. Trying to connect to the top of the block can have unexpected results.
- It is usually better to put all the control circuitry underneath the lift to minimize the total floor space the lift requires.
- All designs that use more than one stacked piston will need a piston control line to follow the lift shaft. This signal must connect to every piston in the group.
Lift Designs[]
Simple Lift[]
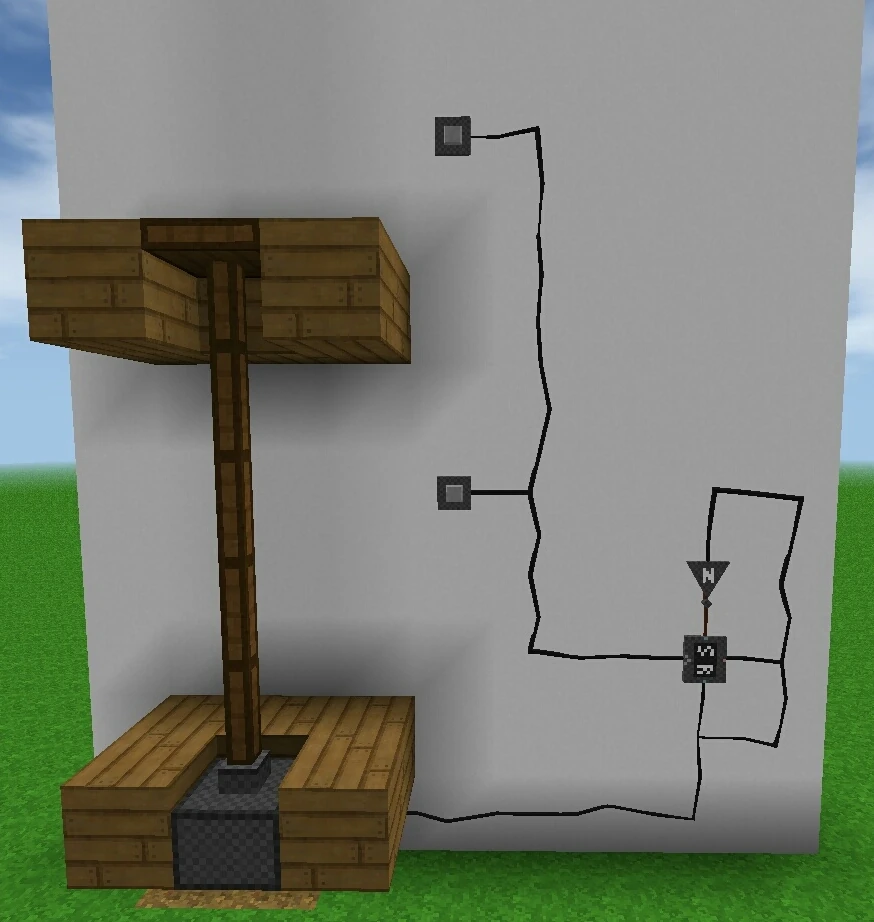
A simple elevator can be made by using a piston and a small circuit. The circuit is a 'D' or toggle latch. This circuit is just an SR latch with an inverter, as shown. Set the piston to the number of blocks between floors (maximum of 8 blocks). Also it should be taken care to set the speed of the elevator to medium, slow or very slow because if the piston is too fast you will lose some health when going down.
Adding a Floor Material[]
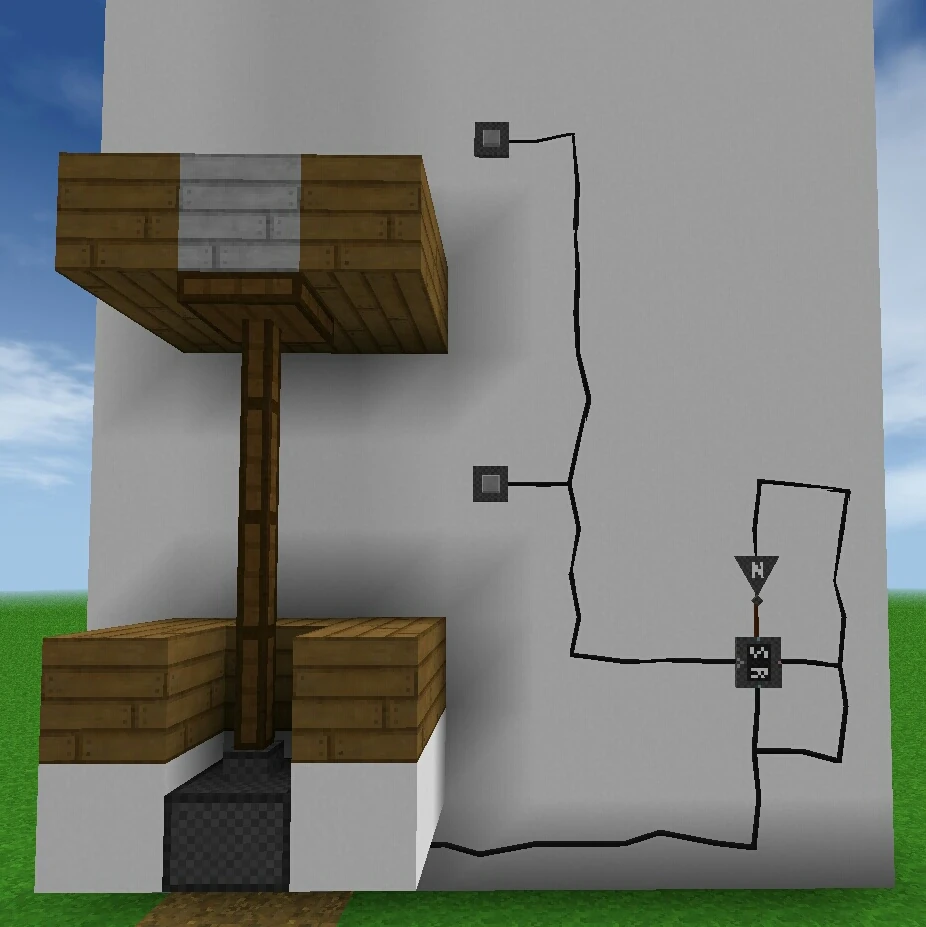
If you don't want the top of the piston to show you can add a block on top of it. Use a Pulling Piston and set the number of blocks to 1. Use this same technique if you want more than a single block on top of the piston (like when you have double doors). If you have 2 blocks just set the number of blocks to 2, etc.
Taller Floors[]
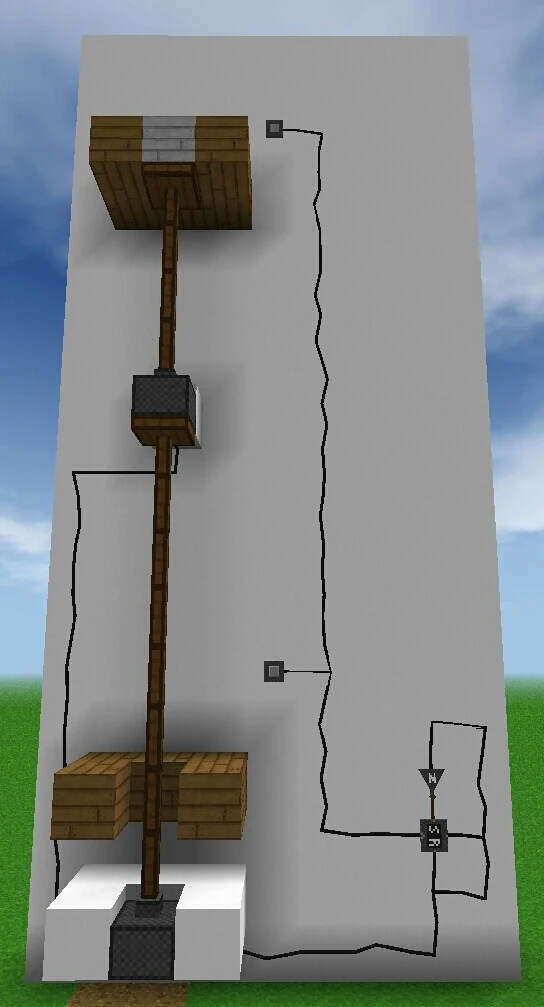
If the distance between floors is more than 8 blocks you'll need more than a single piston. The top piston is the same as above but the lower one must be a Strict Pulling Piston with the number of blocks set to 1 (or 2 if you have a flooring material as described above). The lower piston should be set to a distance of 8. Subtract 8 from the total floor distance and set the top piston to that number.
Add a connection to the piston tower at the point where the top piston will be when the bottom one is fully extended. See the image.
Wider Lifts[]
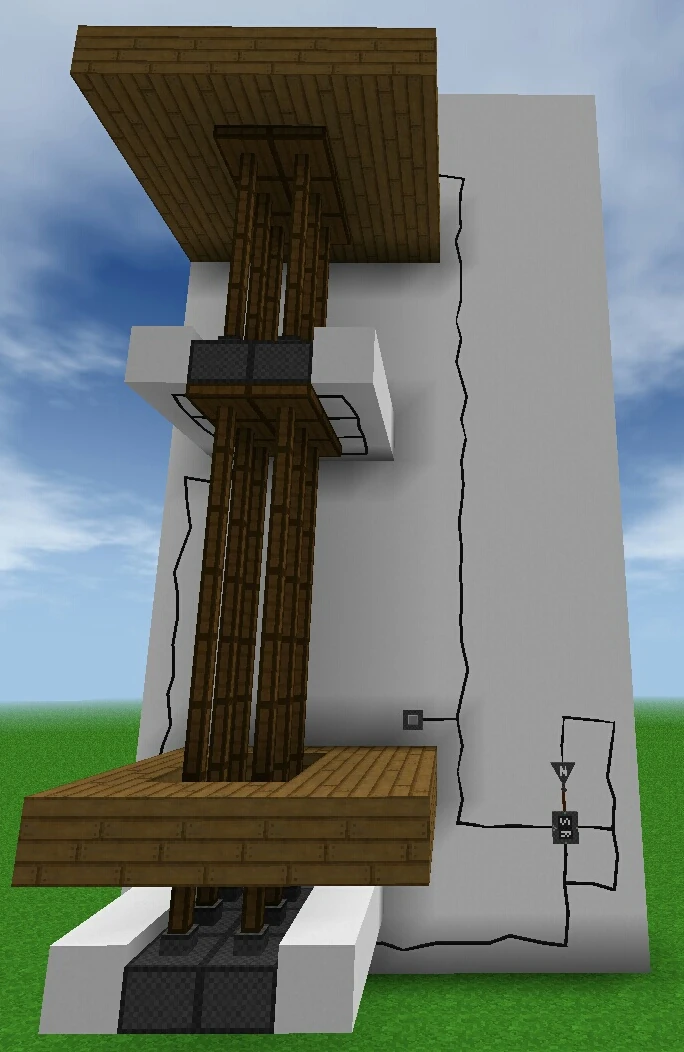
You may want a lift larger than a single piston. A simple one-floor lift can be made as big as you want. Just use wire-through blocks under the piston group, so they can all be wired together. A taller lift can be as wide as you want in one direction but can only be 2 blocks maximum in the other. This limitation is because you cannot connect wires to the bottoms of the top pistons.

Multiple Floors[]
IF you have more than two floors, piston control gets much trickier. You usually want to specify which floor you want to go to.
All multi-floor designs require a piston control line run up the shaft. They should also have a "CALL" button to use if the lift is not at the floor you are on. The simplest design also needs two more signal line going to each floor, for a minimum of four signals total. With these taller lifts the piston control wires can interferre with the rider's access to the buttons. This cannot be avoided if you want a lift bigger than a single block (or a single row).
One-by-One Design[]
This is the simplest multi-floor circuit and uses just two buttons at each level - UP and DN and it just takes you to the next floor. Then you have to tap one again to go to the next floor, etc. Adding the CALL button increases the complexity such that the next design is better. If you have another means to change floors (such as an emergency stairwell) this can be useful for 3 to 4 floors. A CALL button is still included for the ground (or '0') floor.
Basic Design[]
This design uses a separate button for each floor. As soon as the button is pressed the lift starts up. The circuit is relatively simple but it requires as signal line per floor to go to the control circuitry. Having a lot of buttons where the rider can tap them can take up a lot of space or even be impossible where there isn't enough room. The next design uses less space but has more complex circuitry.
Advanced Design[]
This design is more suitable for a lift with many floors. Instead of a button for each floor, it has a numeric display and the user presses an UP or DN button until the desired floor number shows. Then they hit a GO button to start the lift. This is a fairly complex circuit and requires 5 signal lines that go to every floor in addition to the piston control line.
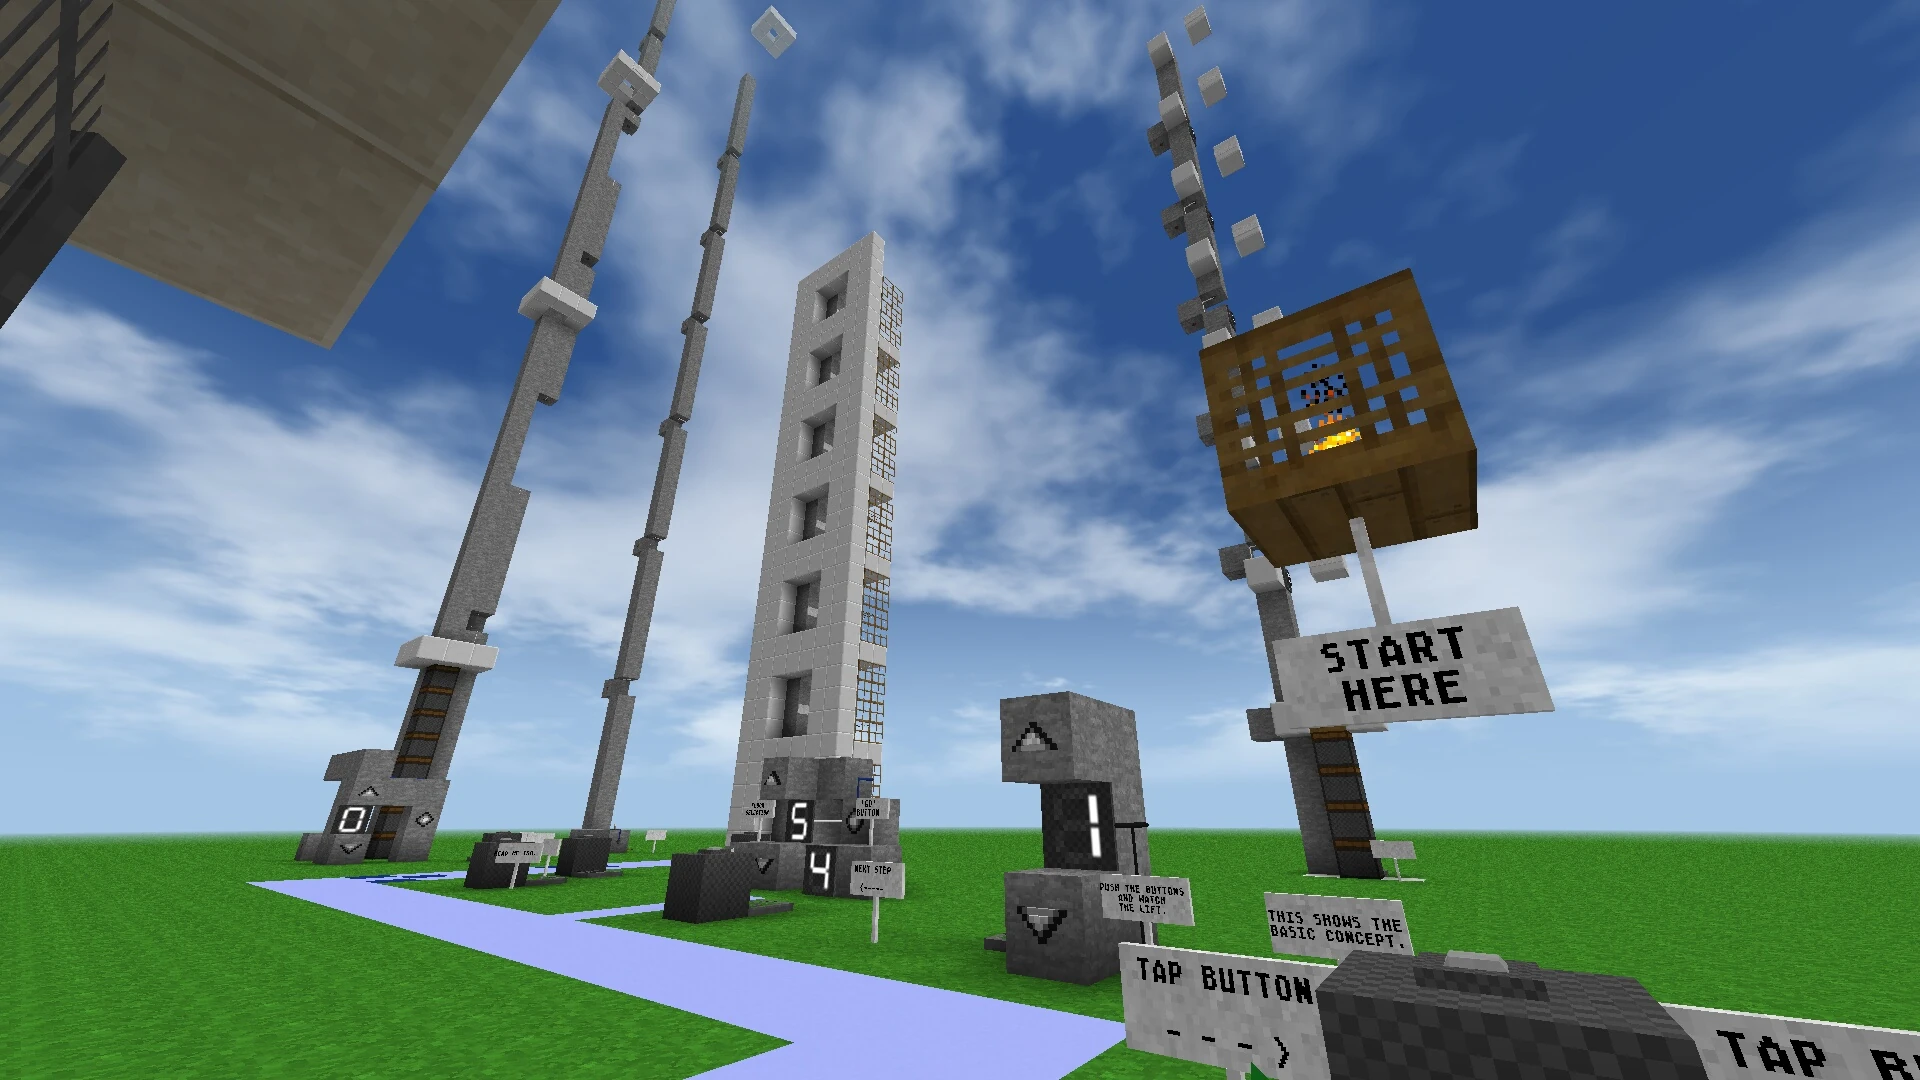
Advanced Lift and Tutorial World[]
The following world shows the steps to build an advanced elevator where you can select your desired floor. With this circuit, you choose the floor you want to go to then tap 'GO' to start it. There's no need for a separate button for each floor. The circuitry is simple but it does require Memory Banks.
It also shows the other issues with using pistons as lifts, such as dealing with wider spaced floors (over 8 blocks apart).

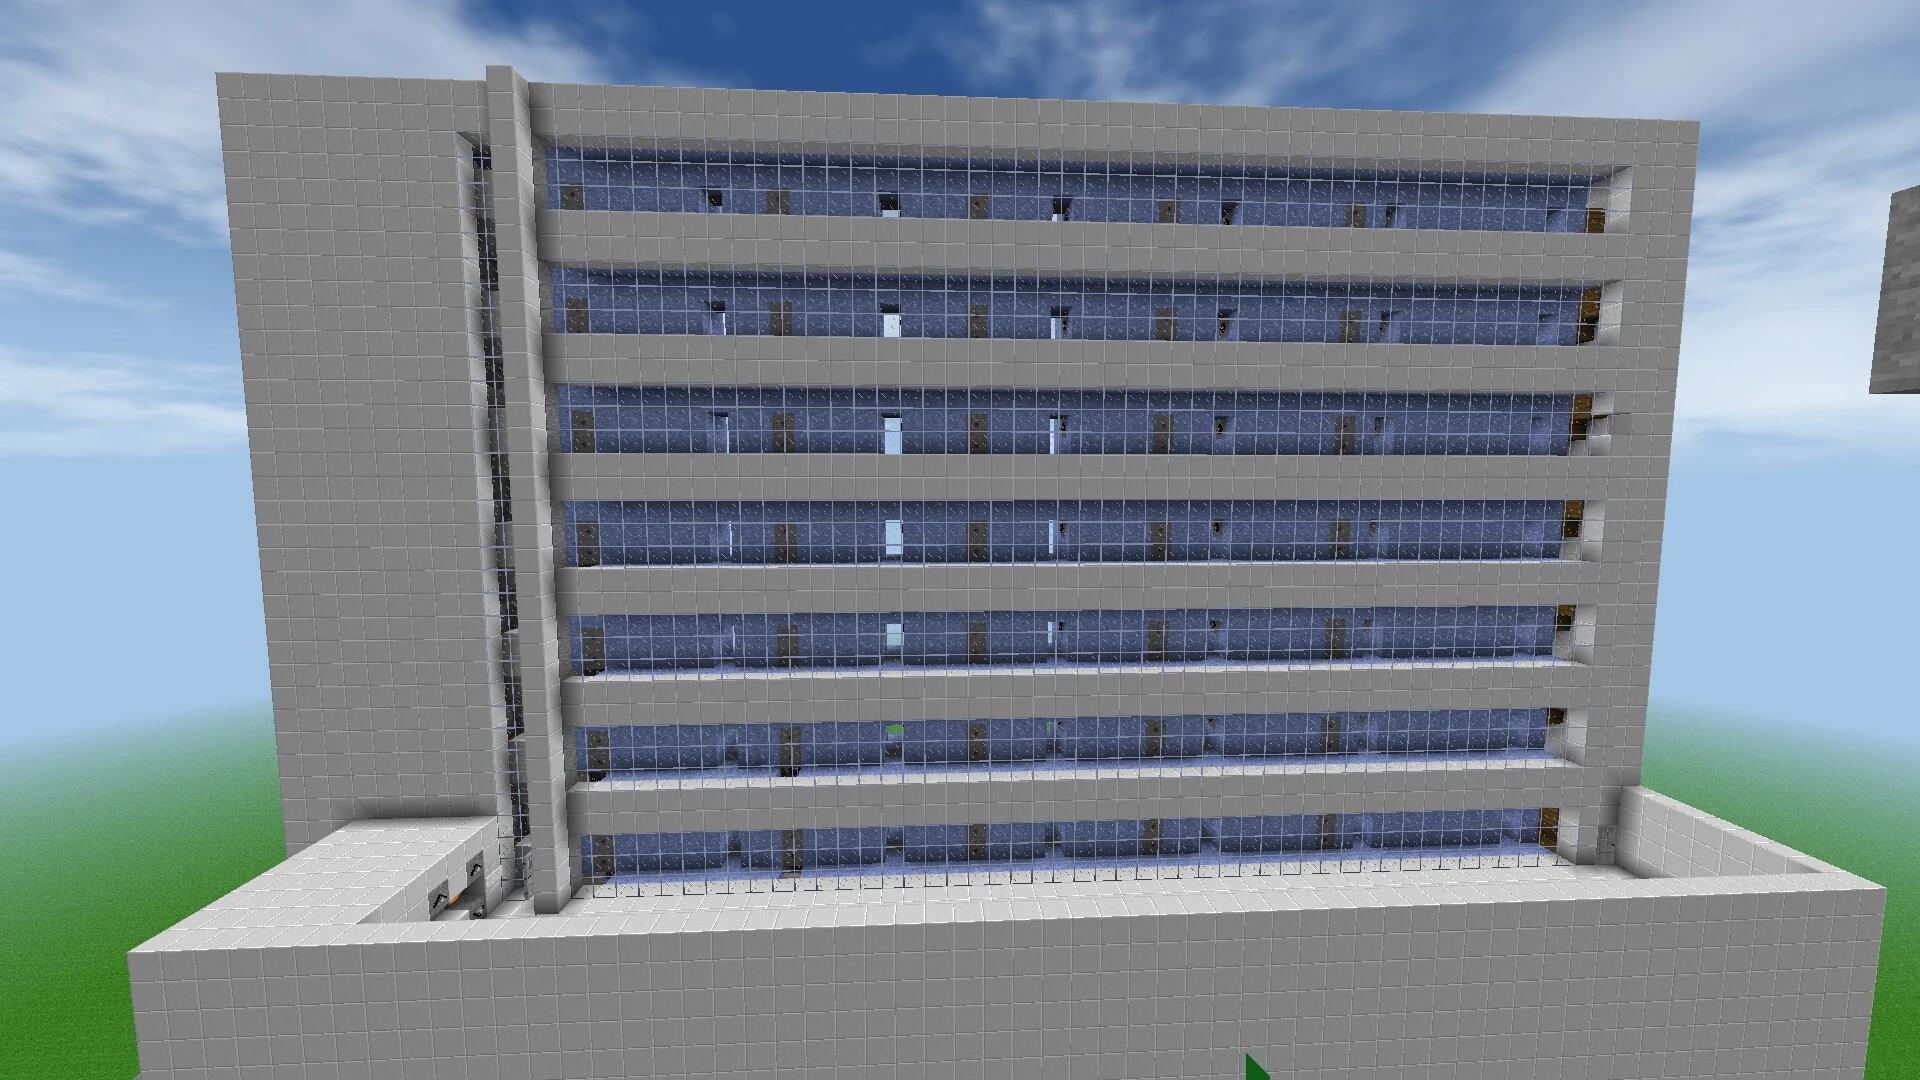
2-D People Mover[]
This world is an 'elevator' where you can not only choose the floor you want but also pick which room on that floor. It will take you directly to that room. When you are done, it will take you back to the entrance. A furniture cage is required so the character can be pulled by the piston but this also means the downward speed can be fast without harming the character.
It is essentially the advanced lift circuit repeated horizontally at each floor. It uses a 'trick' to tell the horizontal circuit when it's at the desired floor. There is a wire-through block under the floor which the vertical part pushes with the carriage. This block completes a connection only when the lift has stopped. The horizontal circuit then activates through this connection so only that floor's horizontal part will move.
Here's the link: https://dl.dropbox.com/s/iux30nwtn4kinzz/2D%20Lift%20adv.scworld?dl=1

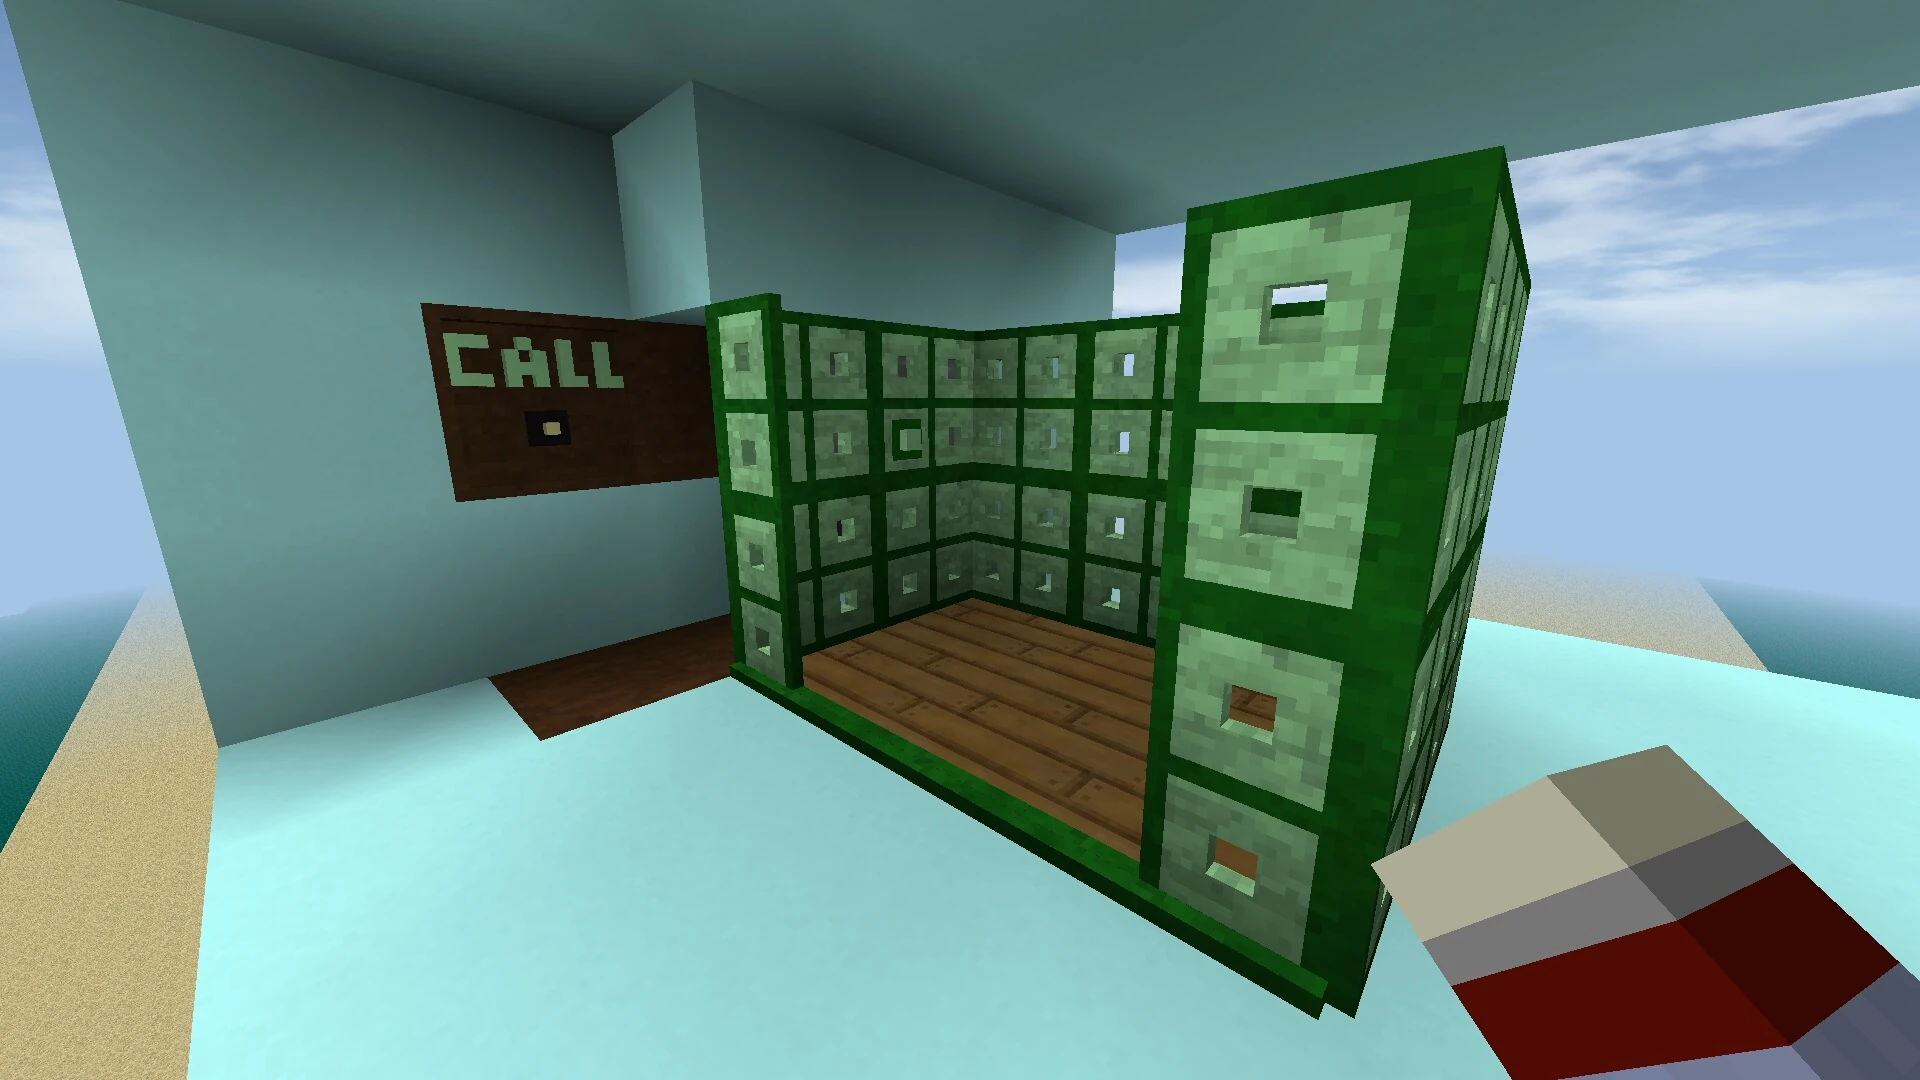
Automatic Double Safety Doors[]
Here's another small, lift-type world. The lift itself is very basic. The purpose of this world is to show what can be done with combining furniture with electricity using some careful planning...
This lift has a proper set of double doors like all safe elevators do. One set on each floor and another set that moves with the lift. These doors (should) open and close automatically when the lift stops or starts up.
I said 'should' because of the way multistate furniture works. Sadly, I found another 'bug' in Kaalus' work - multistate pieces do NOT always start up in the same state they were in when the game closes. (dammit, Kaalus!) So, sometimes the doors have to be "re-synchronized" but if you follow the directions in the world, it seems to work properly.
I used several 'tricks' here. - One is that the lift has a layer of wire-through blocks under the floor that completes an electric connection only after the lift stops at that floor. (A trick I also used in the 2-D lift.) - The second is that a some "multistate connected" furniture pieces are used as 'wires' to transfer the state-change to other blocks (the doors). When you see the world, these are the 2 brown granite blocks in the floor. - A third trick is that we can use different electric signals to trigger the state change. By having two separate electric connections to the same group of multistate blocks, either one will trigger the change without interferring with the other signal.
Here's the world link: https://dl.dropbox.com/s/ff8xfpay5fv03hh/Autodoor%20lift.scworld?dl=1
