Description
For the basic furniture, see this page More advanced furniture pieces may be made using the workbench. They can be made interactive, or multi-state. This means it will change when it's tapped, or when activated via electricity. This lets us make working windows and doors, and so much more.
They can also be made 'connected'. This means that whenever a connected furniture block is activated, all other connected furniture blocks that touch it will also be activated. When building a two-block high door, you don't want to have to open each block separately. Make them connected and when one is opened, the other will open as well. This can also be used to make double-doors where both sides open when any one block is activated.
Furniture may include a torch or wicker lamp to make the piece a light source. Lighted furniture may be made as a basic piece (always on), as an interactive piece (you can turn it on/off) or as a connected piece (it turns on/off along with another piece). Lighted furniture may even be used in making furniture switches. However they cannot be BOTH connected and a switch.
Furniture may be made as custom switches and buttons. These may be used to replace the standard switch and button.
Interactive Furniture
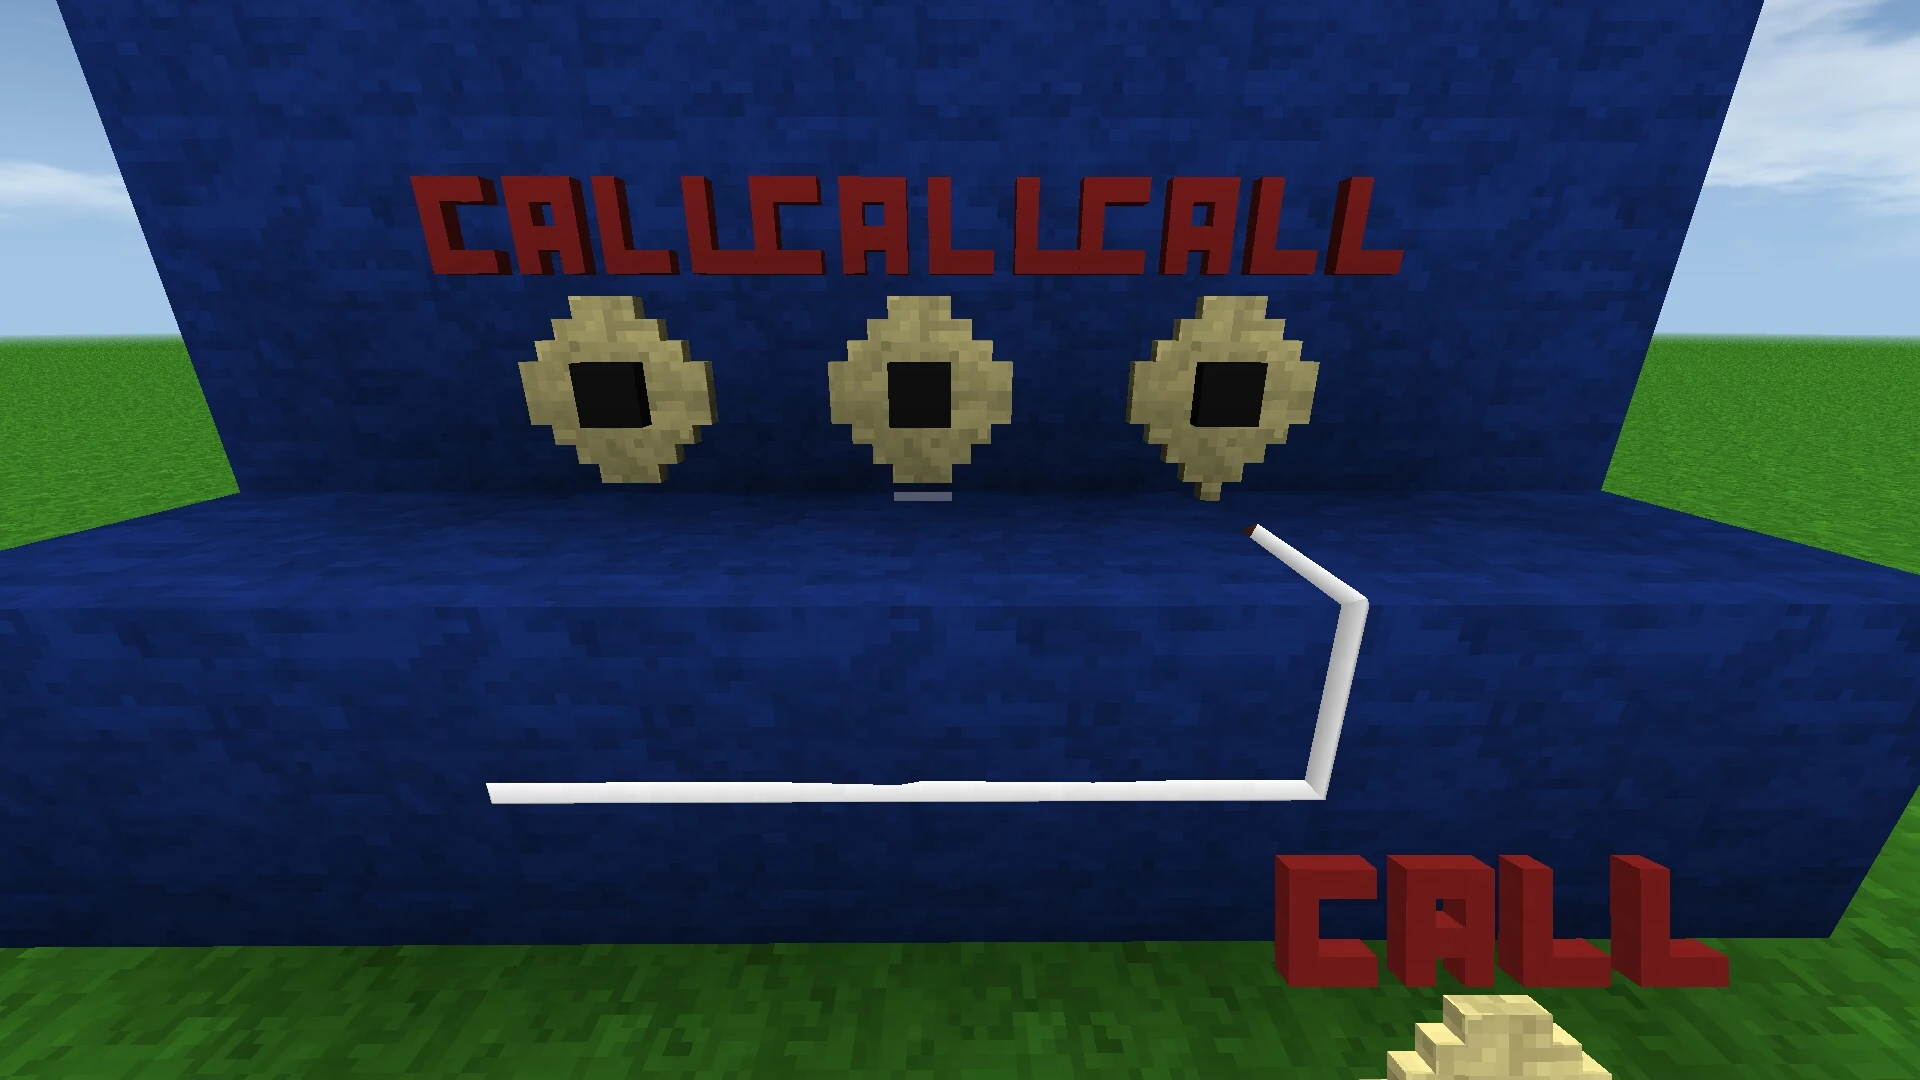
Interactive furniture can have from 2 to 9 different states. When the block is activated, either by tapping on it or by an electric signal, it will change to the next state. If it's in the last state, it will next change to the initial state, and repeat. You could make for instance, a window that can be closed, opened partway or opened completely using only 3 states. Secret passages can be made if one state is made to look just like the wall and another state is an open passage. This gives us infinite possibilities. Using all 9 states, a short animated scene can be created to emulate a working TV!
Note: The amount of light passing through the block is determined by the state with the greatest transmission. If one state is nearly clear, you will get a lot of light through in any state. This lets you make 'solid' walls that let light through as if they were made of glass. It can also give away secret doors, if there's a light source behind them.
Crafting Interactive Furniture
First decide how many states the furniture block will need. Most applications won't need more than 3 or 4 different states. You can have up to 9 unique states. Then each state must be made separately as a furniture piece unless some states are identical.
Take all the desired states and place them in a workbench, in the order you want them to show. Notice that the finished piece has a small hand emblem in the corner of the inventory slot. This shows that it's an interactive piece. Take the piece from the workbench and it's ready to use!
To make this piece change states, simply tap it. You can also connect a wire to it so it can be changed remotely.
- See these notes about wiring to furniture pieces.
Connected Furniture
If you want to make a two-block door using interactive furniture, you usually don't want to have to open each block separately. Instead, the blocks can be made 'connected'. This means that when one changes, the other one will change at the same time, as long as they are touching (and not just by corners).
All connected furniture MUST be multistate as well. However, each state can be the same.
Non-connected furniture blocks will NOT change even if it's touching a connected block.
Crafting Connected Furniture
Connected furniture is made like (regular) interactive furniture, through the workbench. Simply add a single piece of wire when crafting it and it will be a 'connected' block. This does mean that the most states a connected piece can have is 8, instead of 9.
Using Connected Furniture
When building with connected furniture, you need to pay attention to the current state of each block. You want to have the two parts of a door to open at the same time, for example. It wouldn't be much of a door if you can't walk through it! This means you may have to remove one of the blocks and change the state of the other one before placing the first one back.
Connected furniture can be activated by an electric signal applied to any of the individual blocks.
- See these notes about wiring to furniture pieces.
Lighted furniture
You can make a furniture piece that lights up by creating it with a torch block. Interactive pieces can be lighted, as well. If one state includes the torch and one does not, then the light will turn on and off when it changes states. It can even be made into connected furniture and will work like other connected blocks. If you have a row of lighted, connected pieces then changing one will make the entire row change - without additional wires. This effect can even be used to make 'invisible wires'. Simply make a connected piece that does not change shape and does not light up by itself. Use these to connect the lighted blocks together.
Notes
- The amount of light emitted from the block will be the same regardless of how many light sources are included or the resolution of the final piece.
- Because lighted furniture uses the torch, it also has the torch's flame particle effect. This effect DOES stay relative to the resolution. This means a higher resolution will have a smaller particle effect.
- This effect can be masked by careful design of the furniture. Two solid blocks around the torch will cover up the flames on the sides. You need five blocks above the torch to cover over the flame but the smoke will still be visible. In order to cover all the effect, you need 11 more blocks above the torch block. This will hide all the flame and smoke particles.
Crafting Lighted Furniture
It is made just like basic furniture with the hammer. Simply place a torch in the block you wish to have lighted when you create the piece. To have it turn on/off in an interactive piece, make one state without the torch, for the 'off' state and one piece with the torch, for the 'on' state. Then you can use these blocks to make an interactive or connected furniture piece.
Furniture Switches and Furniture Buttons
An interactive piece can be made to replace the standard switch or button. This lets you make them look like any block you can make. They may be connected to a circuit like the standard items. You can even make 'invisible' buttons by making the piece look like any other block in a wall. You don't even have to have a switch look different when it's on or off. This way, you can make a touchpad switch instead of the typical toggle look.
Crafting Furniture Switches and Furniture Buttons
For a pushbutton (switch), you only need one state for the block, since a button does not have multiple states. Simply craft an interactive piece using your new button design and a pushbutton in the workbench.
For a (toggle) switch, you will need two states - even if you want them to be identical. Place the two states in the table and add a toggle switch. The order of the two pieces defines which is the off state. The first piece will become the off state. The second is the on state. The output will be an interactive furniture piece that can turn an electric circuit on or off.
- See these notes about wiring to furniture pieces.
Wiring Notes
Furniture Placement
This note applies to ALL furniture meant to have a wire connect to it, including any type of switch and any interactive furniture you want to activate by electricity. They can be serious limitations to the creation and placement of wired furniture pieces. However, if you think of a wired furniture piece as another electric item, then the restrictions are clear.
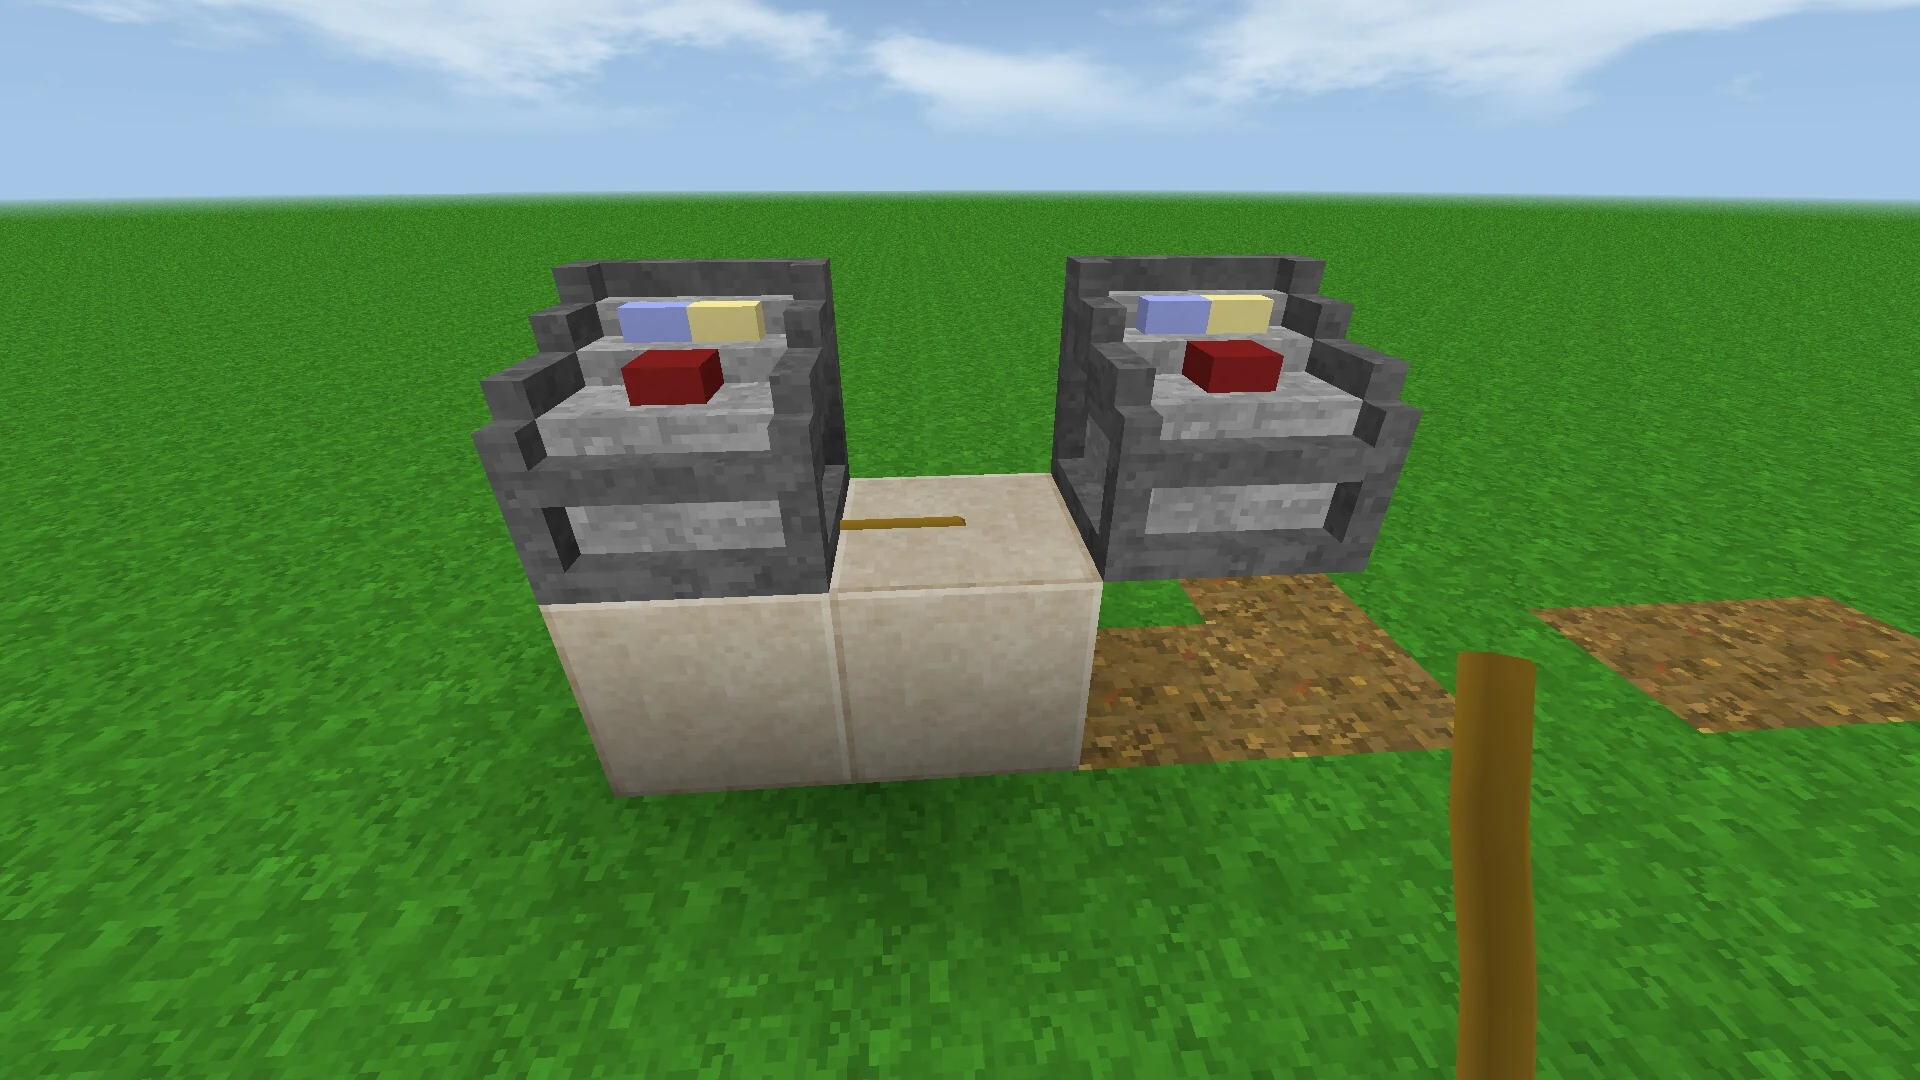
- Whenever a wire is to be connected to a furniture block, the furniture MUST be built so that it extends all the way to the face of the block where the wire will connect. This means you cannot wire to a small, floating furniture piece.
- You only need 1 block to touch this face and that block MUST be one which can normally have a wire placed on it. I.e., this particular block cannot be glass.
This image shows 3 furniture blocks. The leftmost one does not touch the bottom face and will not connect to the wire. The middle one does touch the bottom face but only with glass, and still does not connect to the wire. Only the rightmost block touches the bottom face with a proper block type and the wire connects to it correctly.
- The furniture piece must ALSO be placed with THAT FACE ON a standard block. You cannot have a switch or lightbulb floating in mid-air, only touching another block at its edge. Likewise, you cannot have a wired furniture piece doing the same.
Notice how the wire does not connect to the right piece.
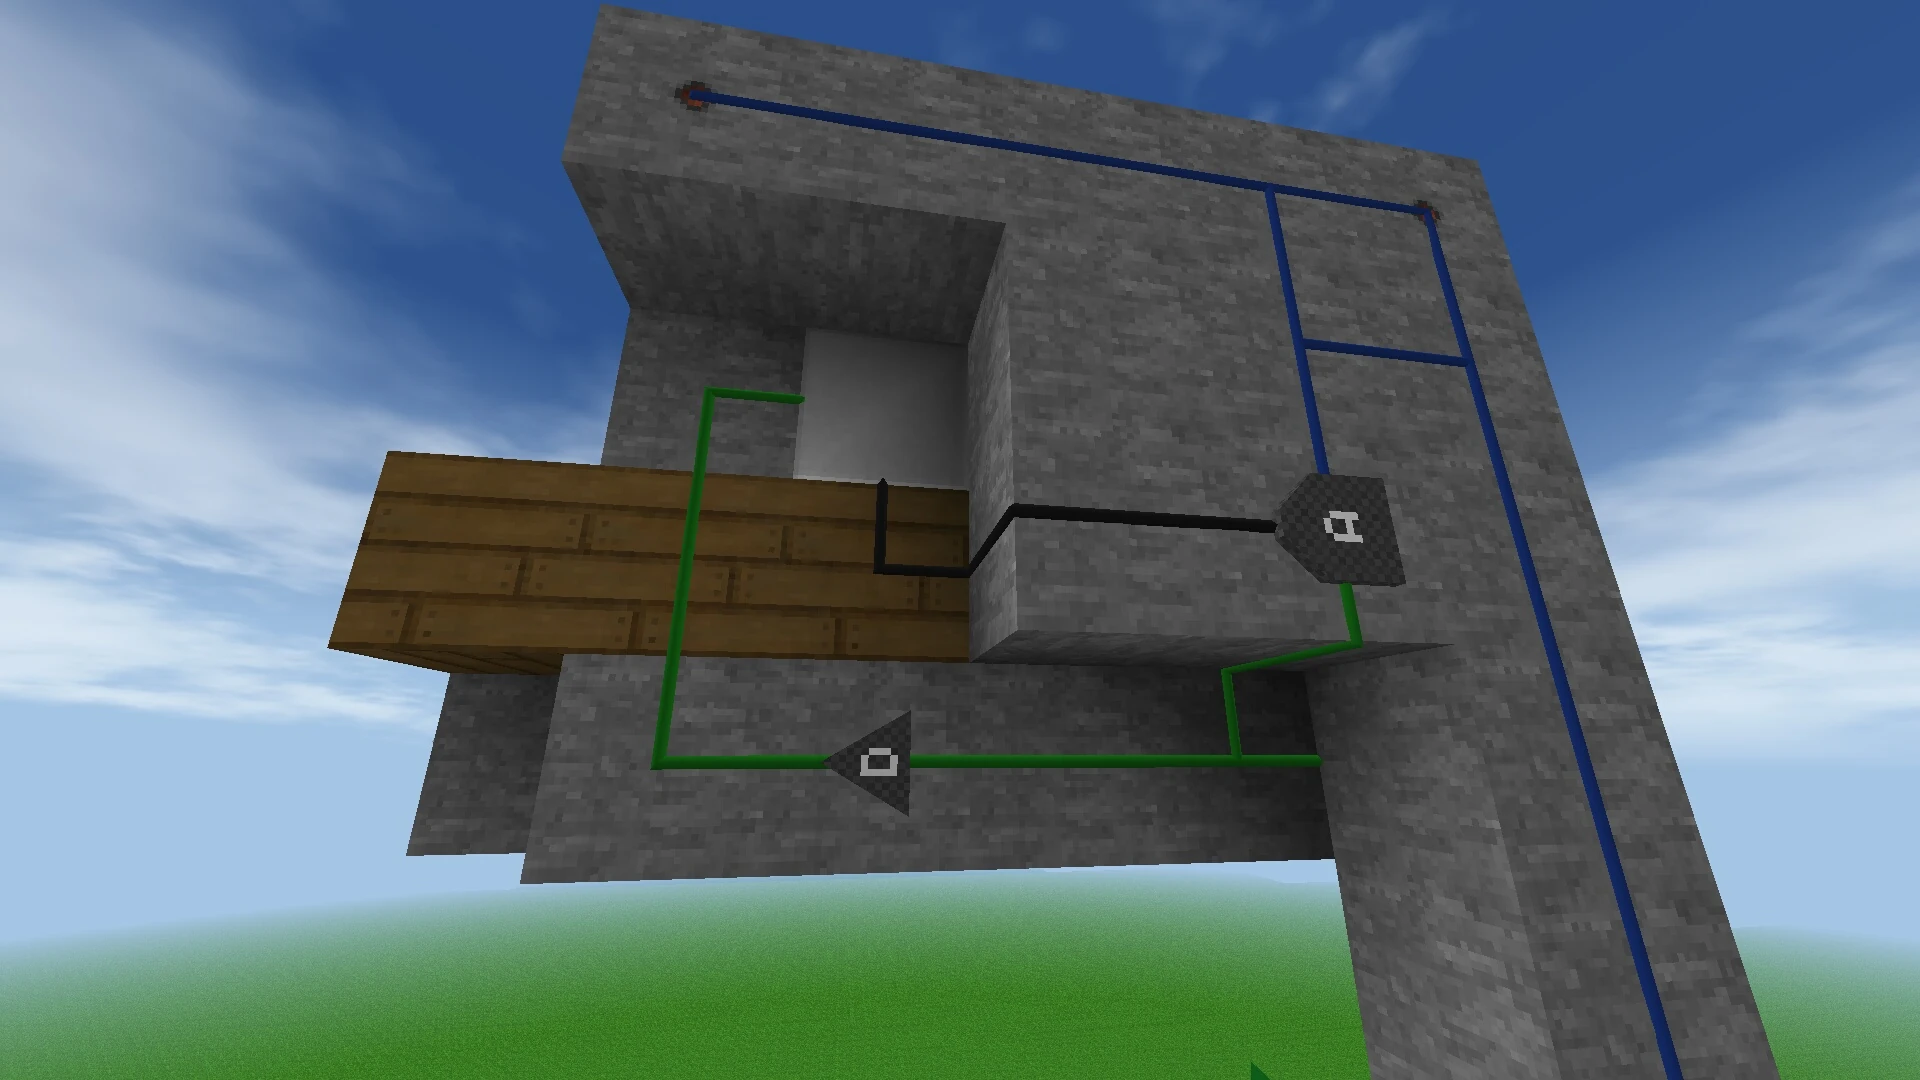
Multiple Circuits
You can connect multiple wires to a single furniture piece, to activate it from several electric circuits. Typically, you do not want the separate circuits to interact and the way to do this is to add an OR gate to combine them. Multistate (and connected) furniture removes the need for this gate if you can route the wires to different places on the piece.
See the image below. Either the red or the black wire will activate the furniture piece, which is the white block. This can be very helpful in compact builds.
Complexity
The complexity of a piece is determined by the number of 'triangles' required to represent the entire piece. Triangles are determined by the number of quadrilaterals times 2. A simple cube uses 12 triangles to represent it. A square torus uses 32 triangles. With enough experience, you can get a good idea of the complexity by looking over the design. Since there is a maximum limit on the block complexity, it behooves the player to keep the complexity to a minimum. There are several things to keep in mind to help minimize the complexity.
- First thing to know is that there is a bug in the game regarding furniture complexity. For some strange reason, if the pattern is not fully lit, the complexity rises significantly!!! So, do NOT make furniture at night, during bad weather or indoors in poor lighting. This is most critical to remember in survival modes, since most people keep the sun at full, when in creative mode.
- The system does not clip out the center of a design even if it is totally enclosed and not visible from the outside. This means you should not leave a design hollow. Instead, fill it with any block. The type of block does not matter as long as none of it is visible and there are no voids inside the design.
- Instead of having a 'hole' in the surface of a design, use an alternate block type or color wherever possible. This can have the same look but will reduce the number of triangles by 8. However, using glass, the complexity is actually increased by 2 triangles. This is because the solid block covers over the 5 faces inside the hole and adds a single face on the surface whereas the glass still lets those 5 faces stay visible, plus it adds the face of the glass, itself.
- If you are making a flat piece that has a design on it, you should try to make the back side a single color. This can reduce the number of triangles up to half.
Notes
- You cannot use a normal block as one of the states in any interactive furniture. However, you can craft a furniture block to look 'identical' to any usable block. See the basic furniture page.
- Furniture cannot be both 'connected' and be a switch source at the same time.
- Furniture that is crafted as a switch cannot be activated by electricity.
- Wired furniture CAN still be activated by touch. They are NOT like the iron door, in this respect.
- Furniture does not automatically orient itself to match other similar blocks. For instance, normal planks will always run east-west no matter which way you are facing when you place them. A furniture block made to look like planks will run differently depending on which way you face when placing them. It's actually even more complicated because it matters how you are facing when first creating the furniture and whether the furniture is rotated when it's made.