Description
This is a small circuit that can be used as a dimmer for the lightbulb.
Use
It works like a typical single button dimmer used in houses today. Tap the button once for full light. Tap it more to dim the light. There are 8 light levels and one off position for the lightbulb.
Building it
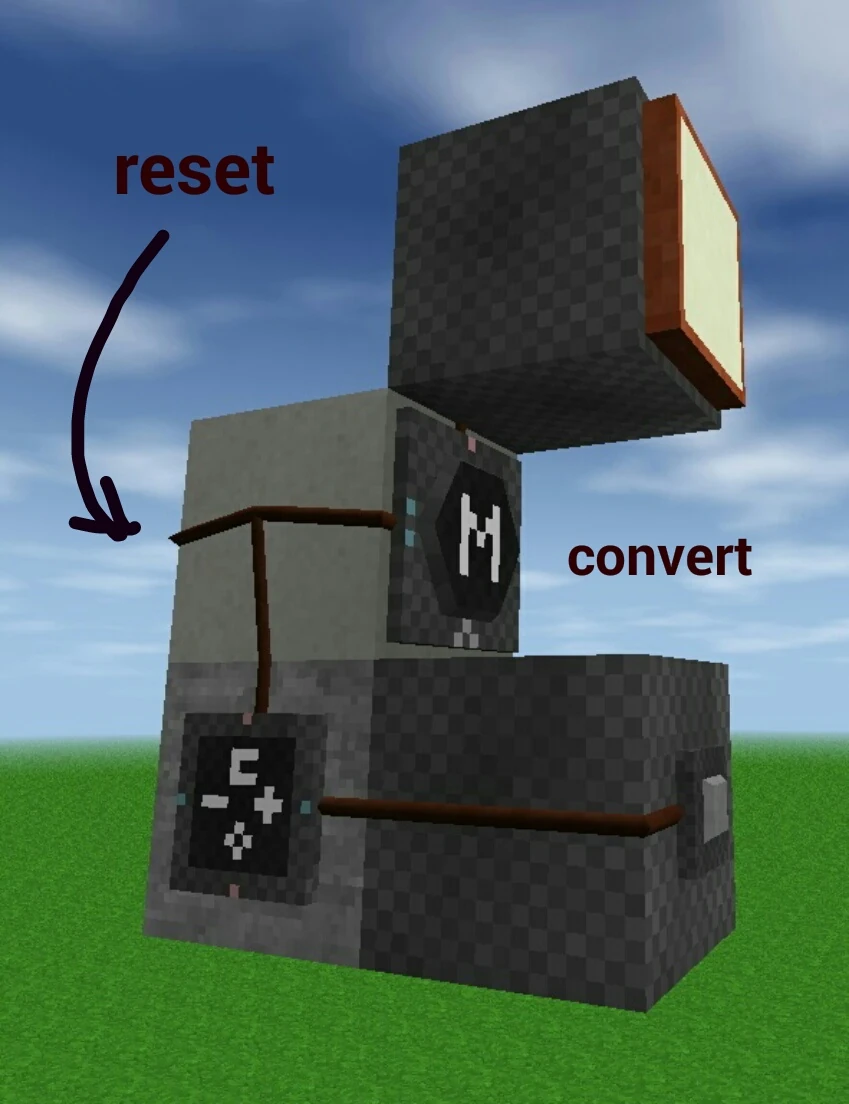
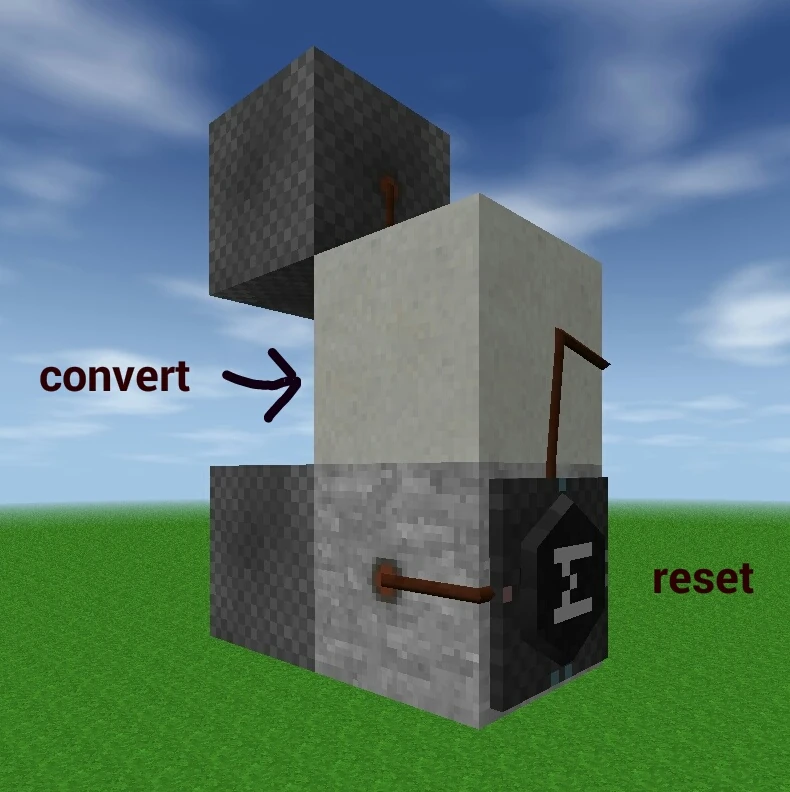
The circuit uses a counter and two memory banks. One memory bank resets the counter after 9 counts (off plus the 8 levels). The other translates the counter's output to the proper values for the lightbulb. There are only two connections - the pushbutton input and the control output. All components may be placed on two blocks as seen. One is any standard block and the other is a wire-through block.
Programming
Programming the banks is straightforward. The reset bank has "000000000FFFFFFF" in the first row and the rest is ignored. This resets the counter to '0', when it reaches the count of 'A'.
The other bank uses its high address input in order to keep the circuit as small as possible. That means it's a little more complicated to program. Instead of writing one row like the reset bank, the first column must be set up. I.e., the first character in each row. Looking down the column, the data would be: 0 F E D C B A 9 8 0 0 0 0 0 0 0. You can program it by copying the following string: 0000000000000000F000000000000000E000000000000000D000000000000000C000000000000000B000000000000000A000000000000000900000000000000080000000000000000000000000000000000000000000000000000000000000000000000000000000000000000000000000000000000000000000000000000000
It can be pasted into the memory bank interface, using the 'linear' input method. See the Memory Bank page for more information on programming it.
Connections
There are just the two connections; the switch input and the output to the lightbulb. In the pictures, the switch input is on the bottom and feeds into the + input of the counter. The lightbulb is connected to the output of the converter bank. The pictures show a wire-through block for this connection, but that isn't necessary.